
Core > User Access > Access policies
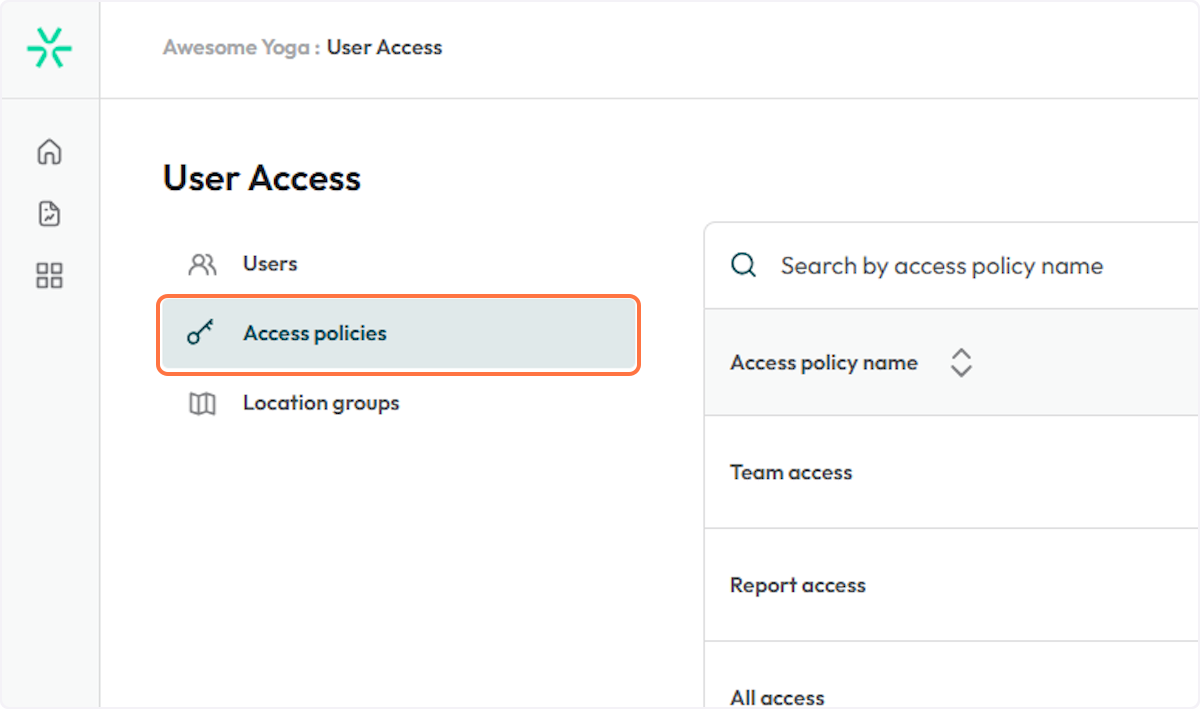
1. Click on key icon to navigate to Access

2. Click on Access policies
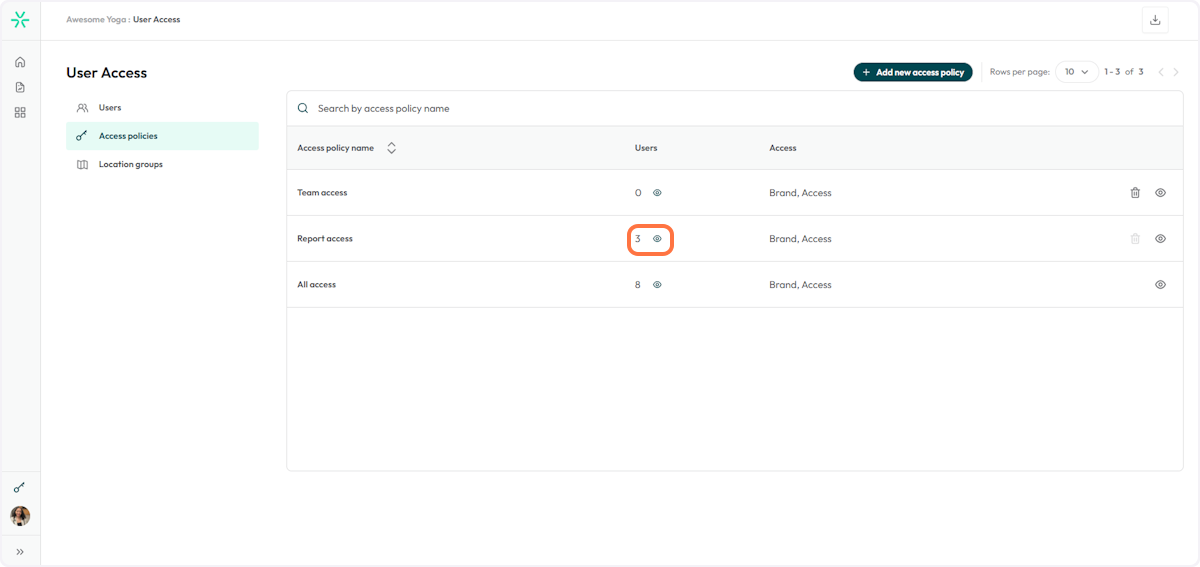
3. The system will open a table with all the configured access policies
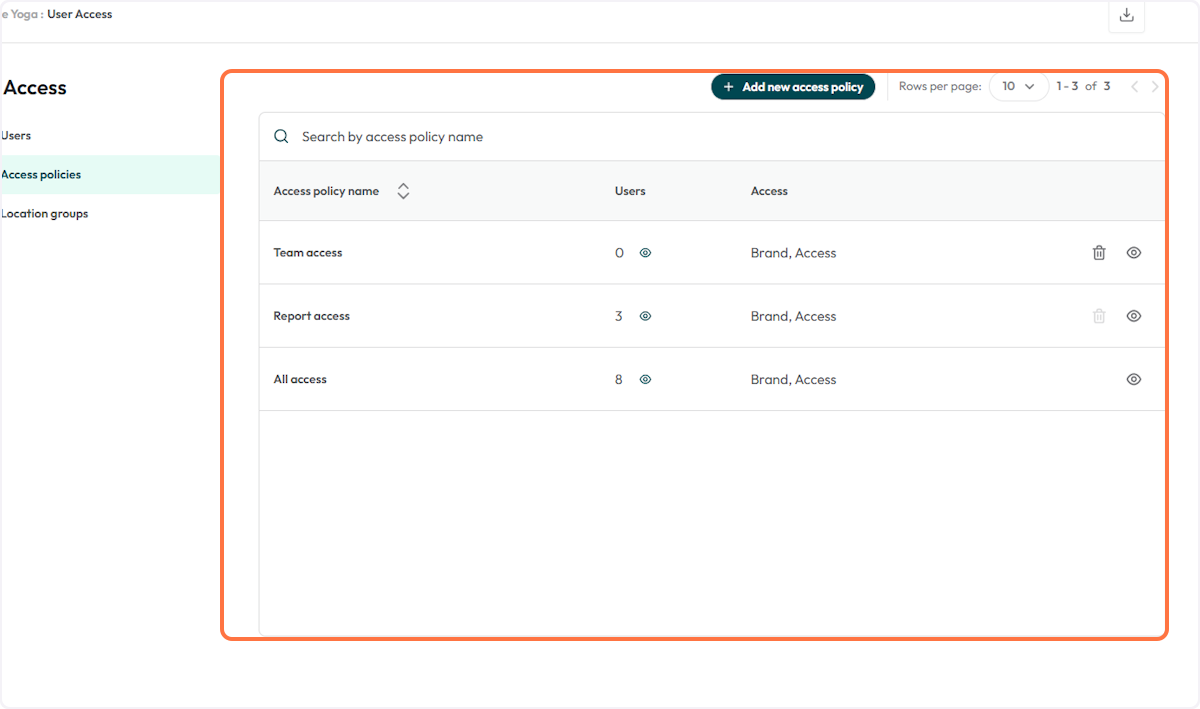
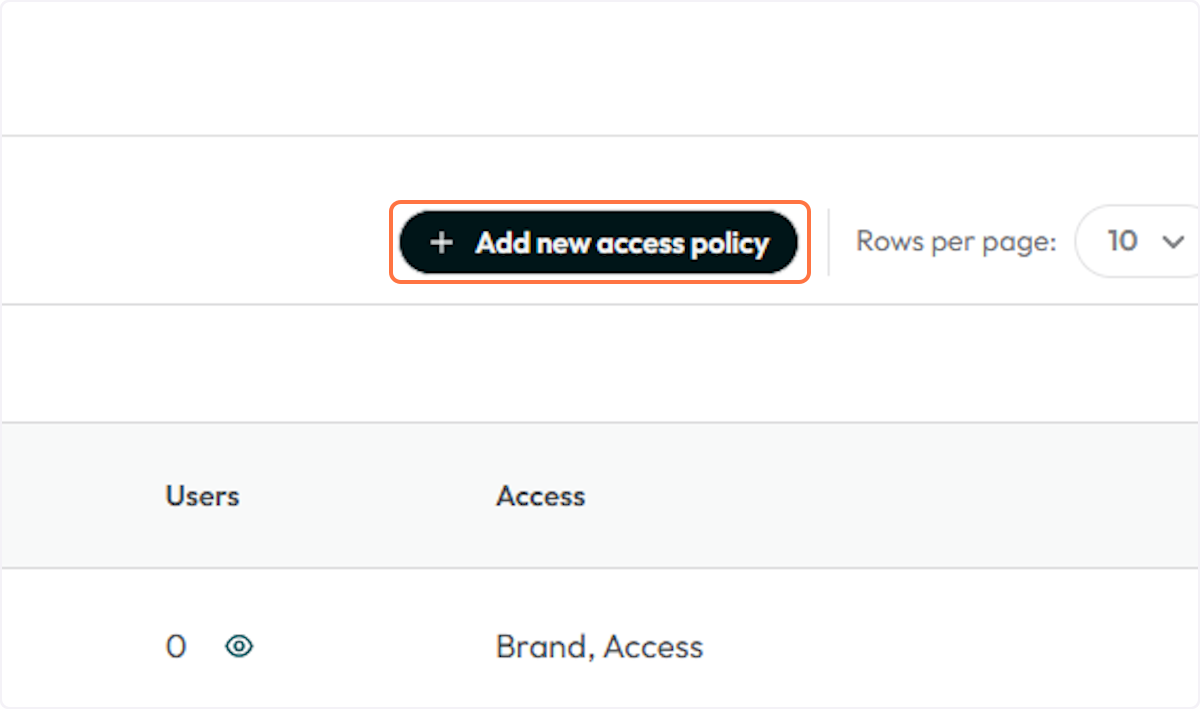
4. Click on Add new access policy to add more
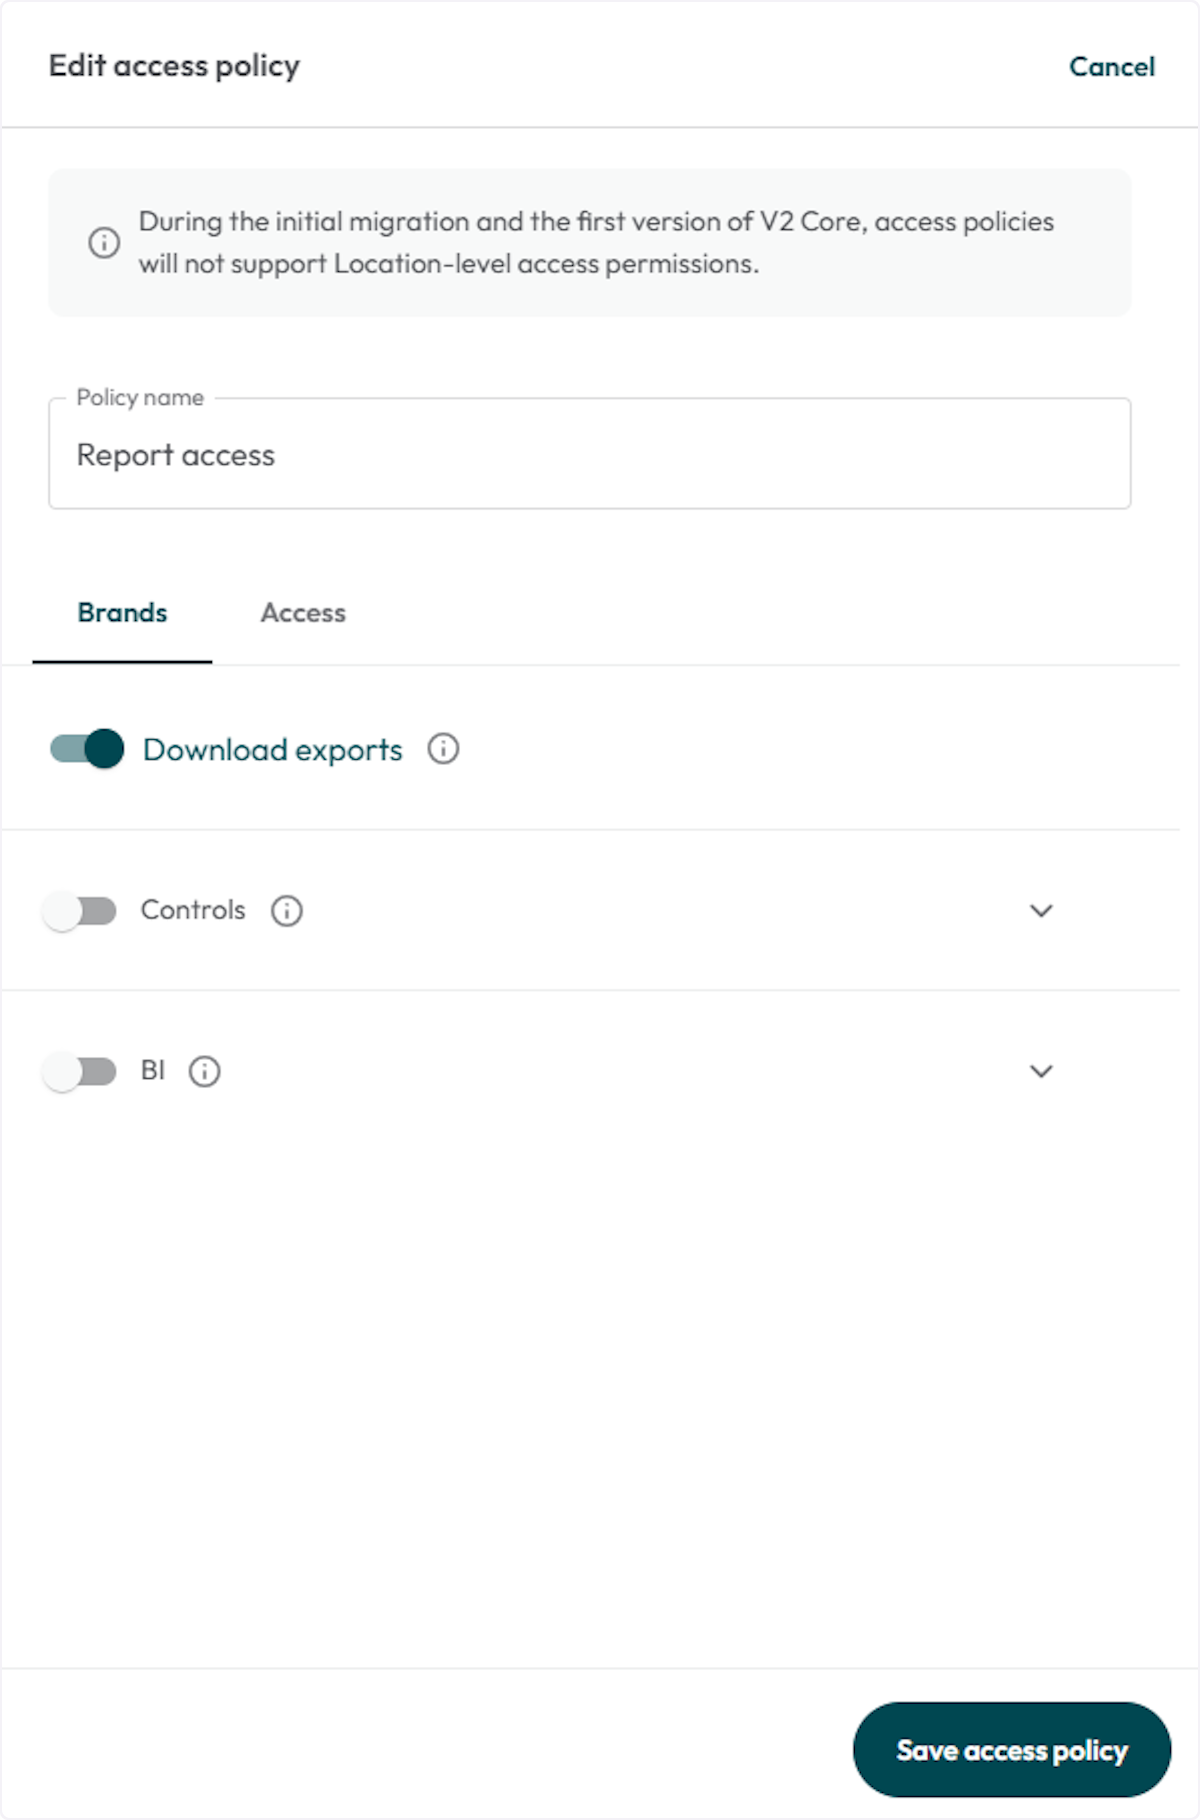
5. Type in the new Policy name
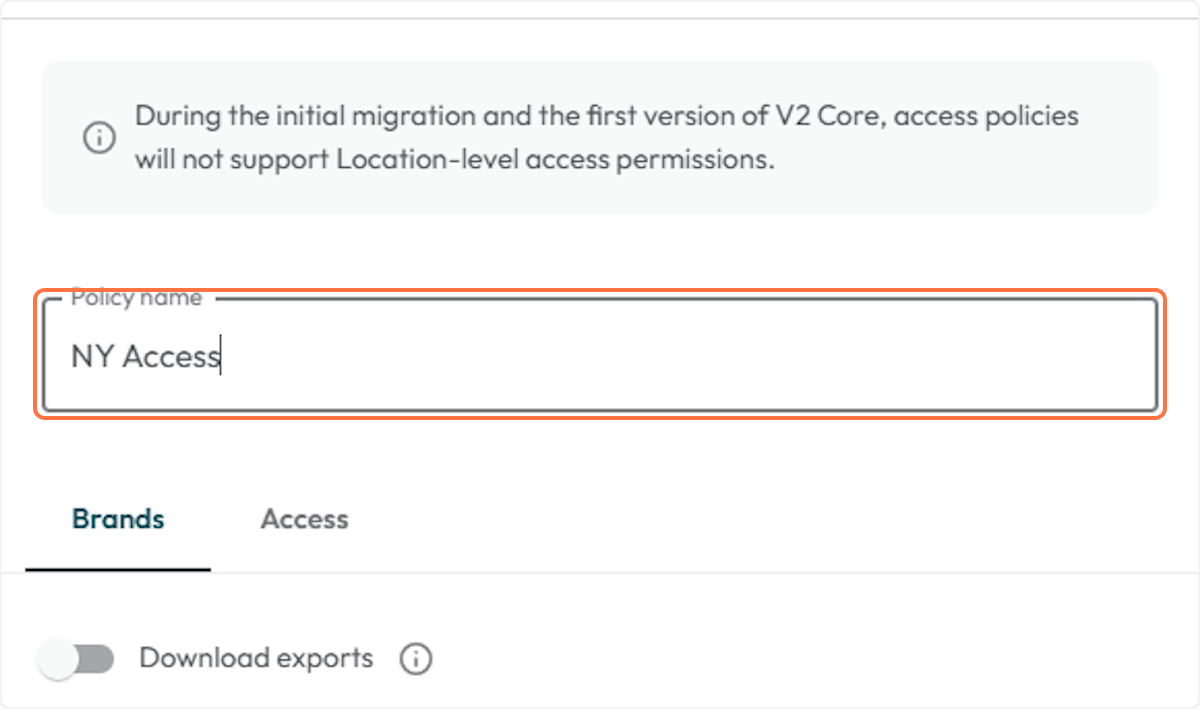
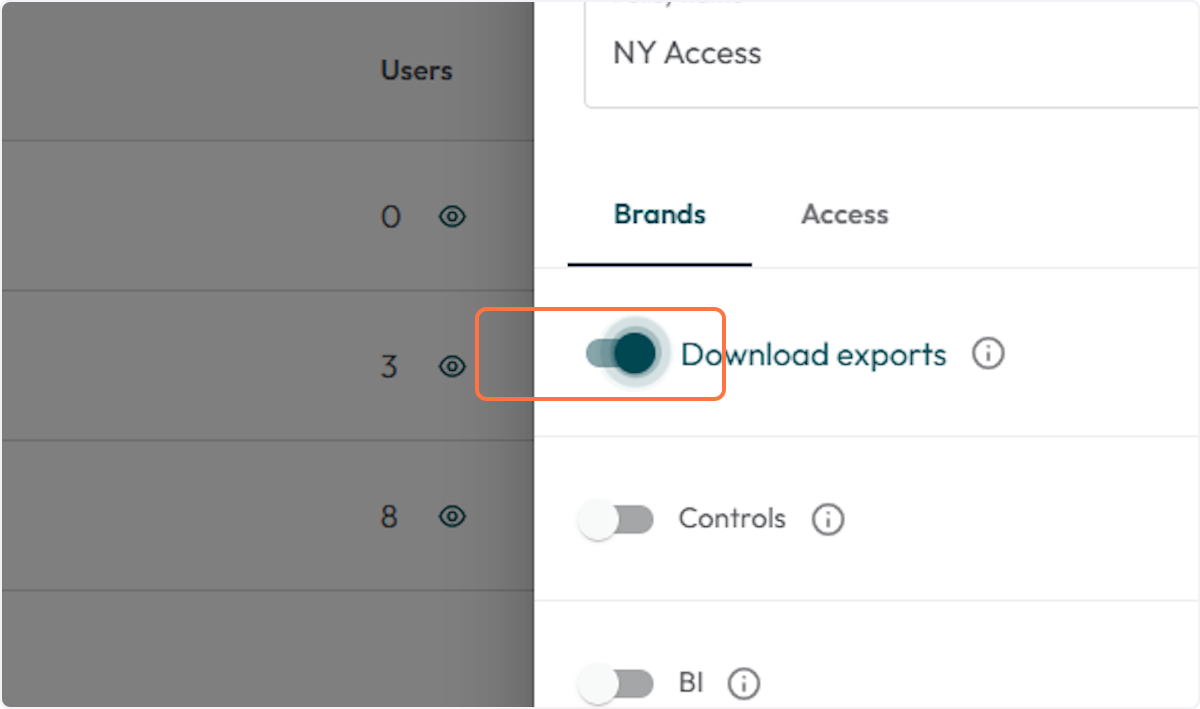
6. Configure the pocily permissions
There will be two permission tabs: Brands and AccessThe Brands tab will have configurations related to the Brand level users. You can allow users to:
- Download exports.
- View and edit the controls section of Core v2 Brands level.
- View, export or explore the BI tool (Grow)
Toggle them on or off to enable or disable the permission.
7. Click on Access
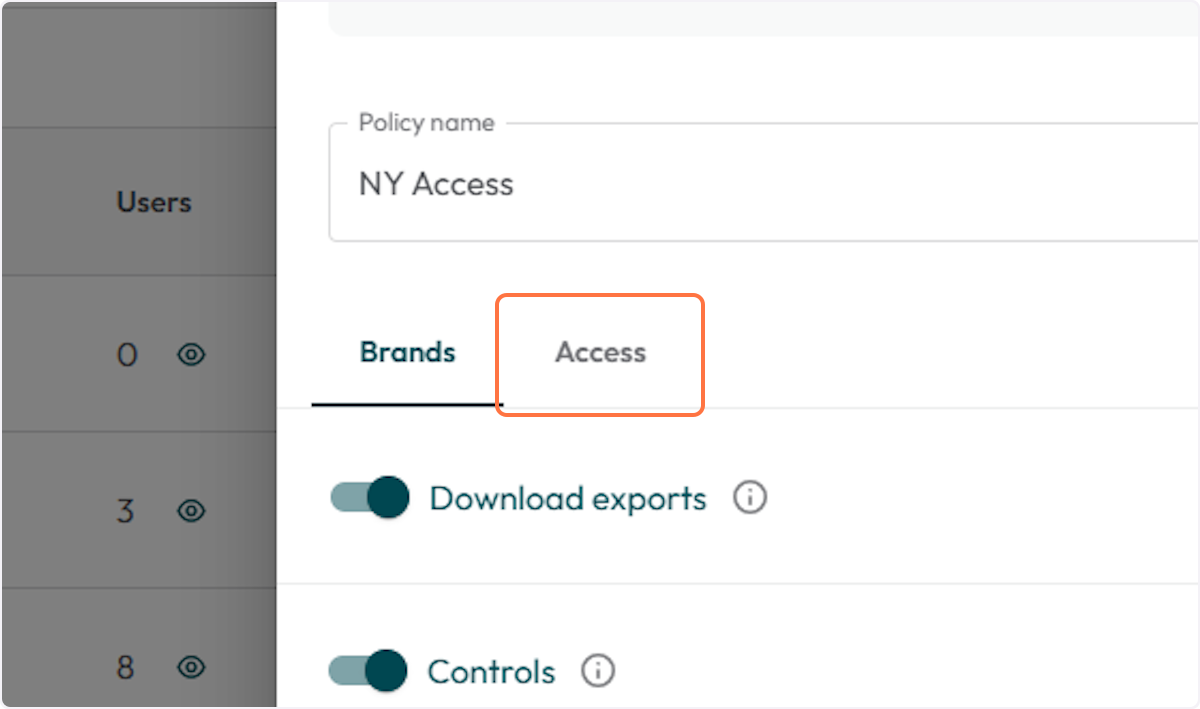
8. Toggle on or off the permissions related to Access
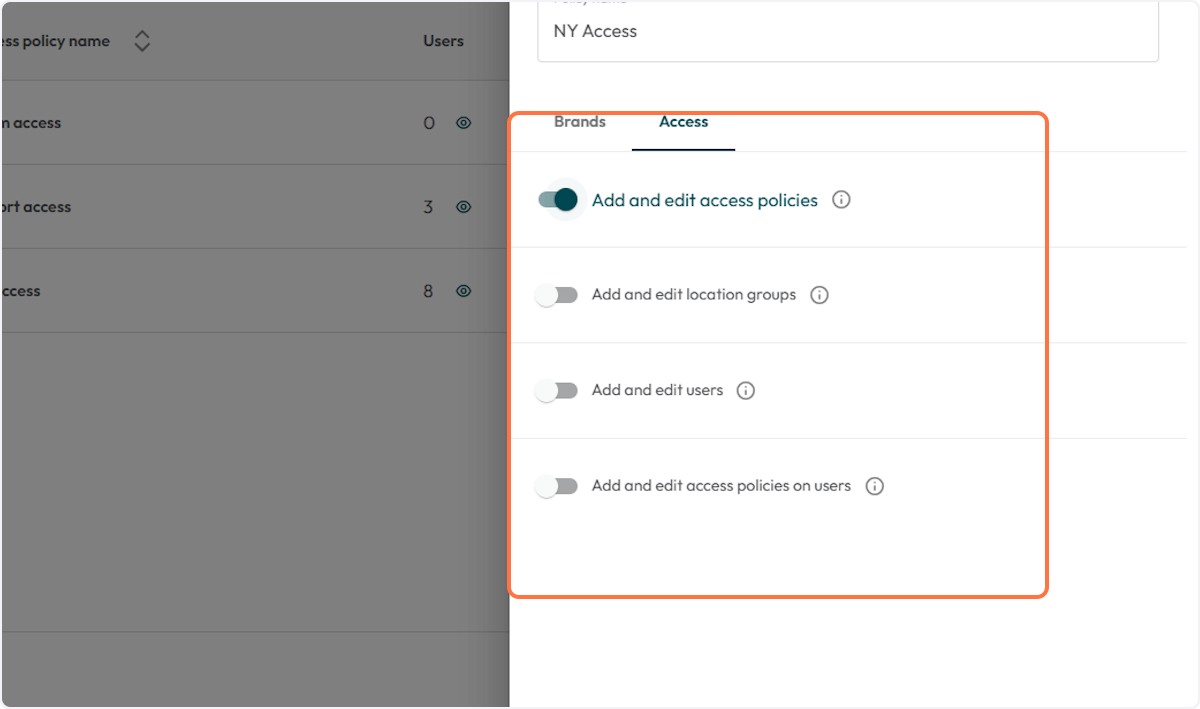
The Access tab will have configurations related to the Access of Brand level users. You can allow users to:
- Add and edit access policies.
- Add and edit location groups.
- Add and edit users
- Add and edit access policies on users
Toggle them on or off to enable or disable the permission.
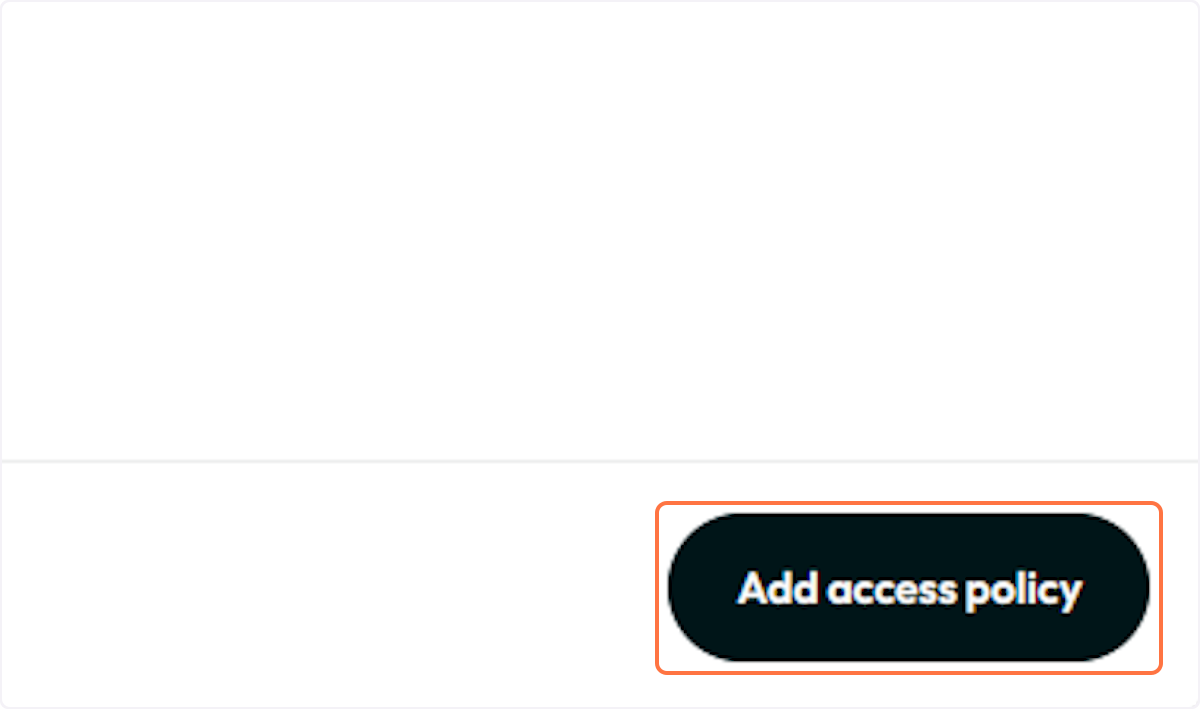
9. Click on Add access policy
The new Access policy will be displayed on the Access table and also as an option to be selected when adding a new user.
10. Click on eye icon to view or edit the Access policy

11. The system will open the view access policy details sidebar and allow the user to edit the policy.
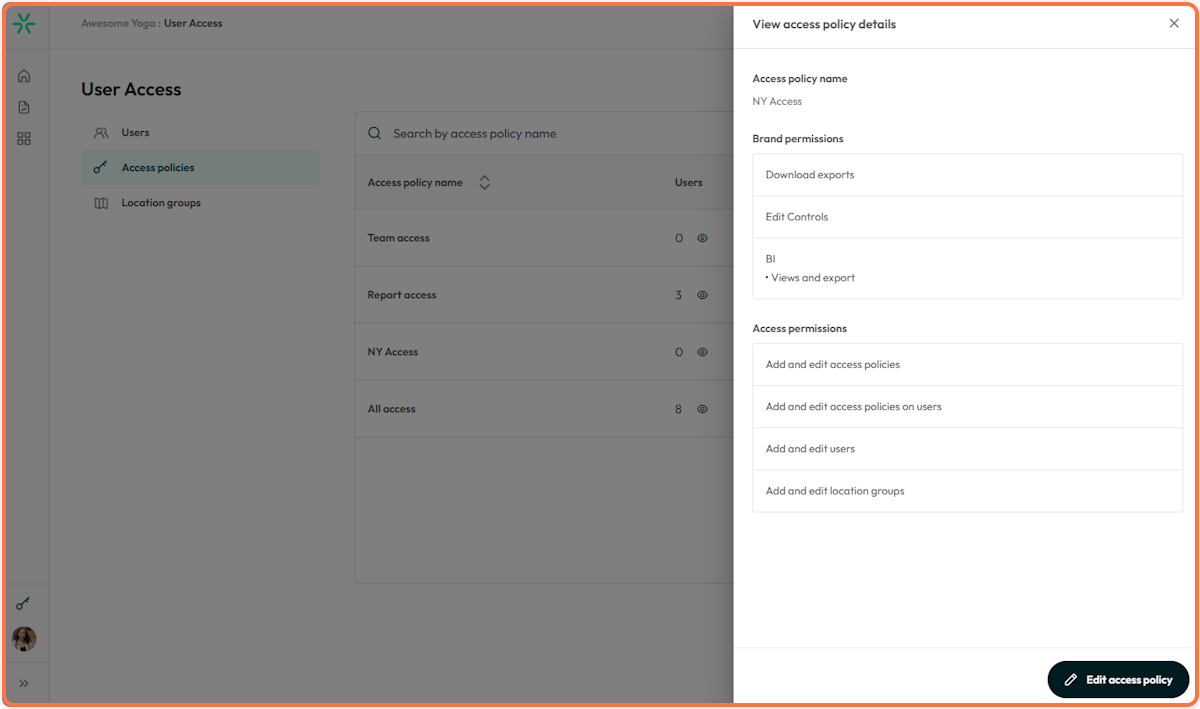
12. Click save changes to update the policy
13. To delete a Access policy, click the trash icon
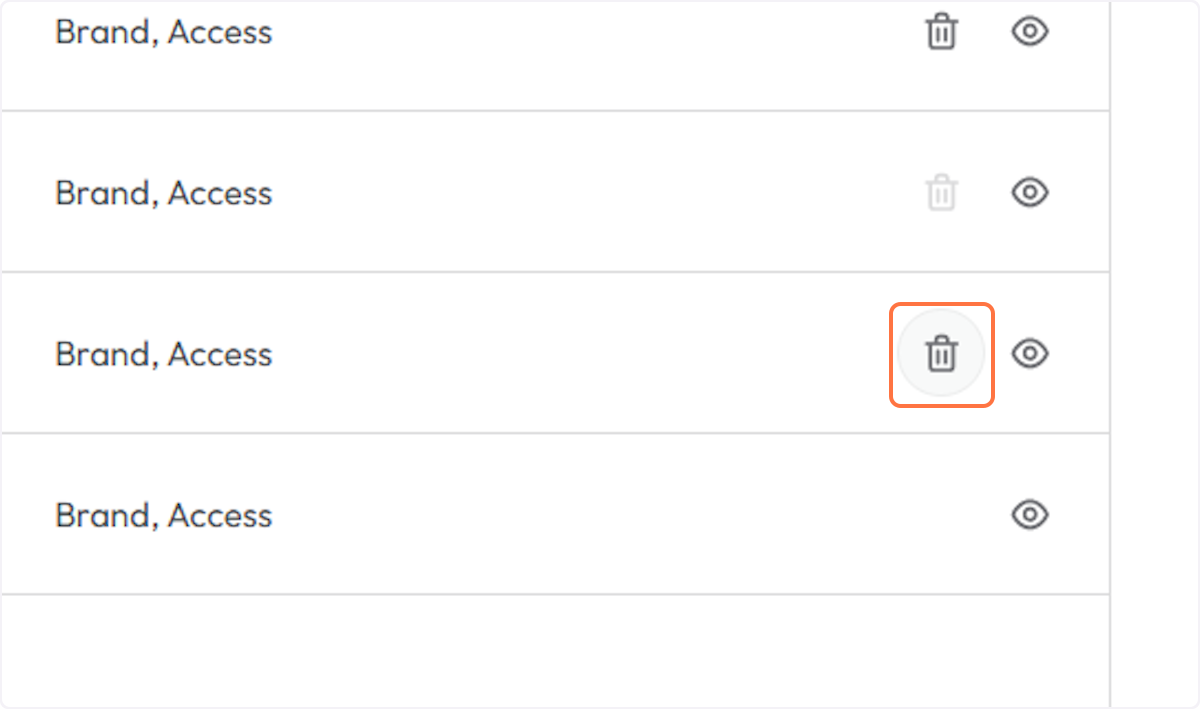
14. Click on Delete access policy

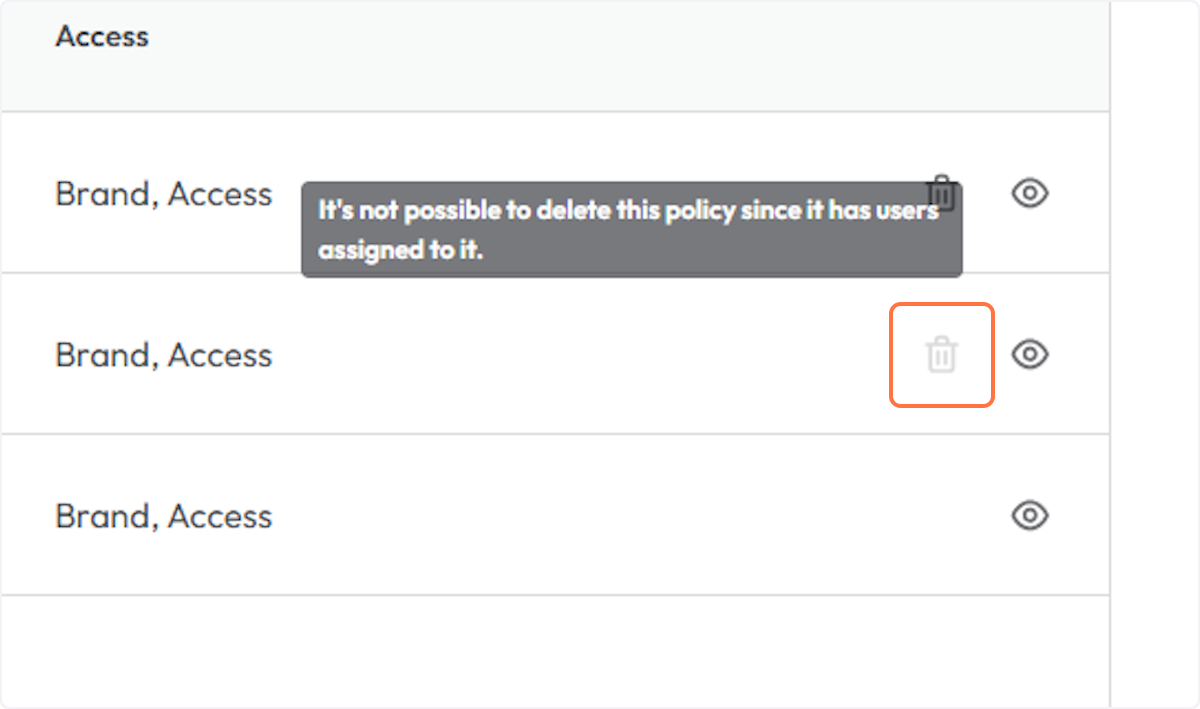
15. If the Access policy has users assigned to it, the system will disable the delete option.
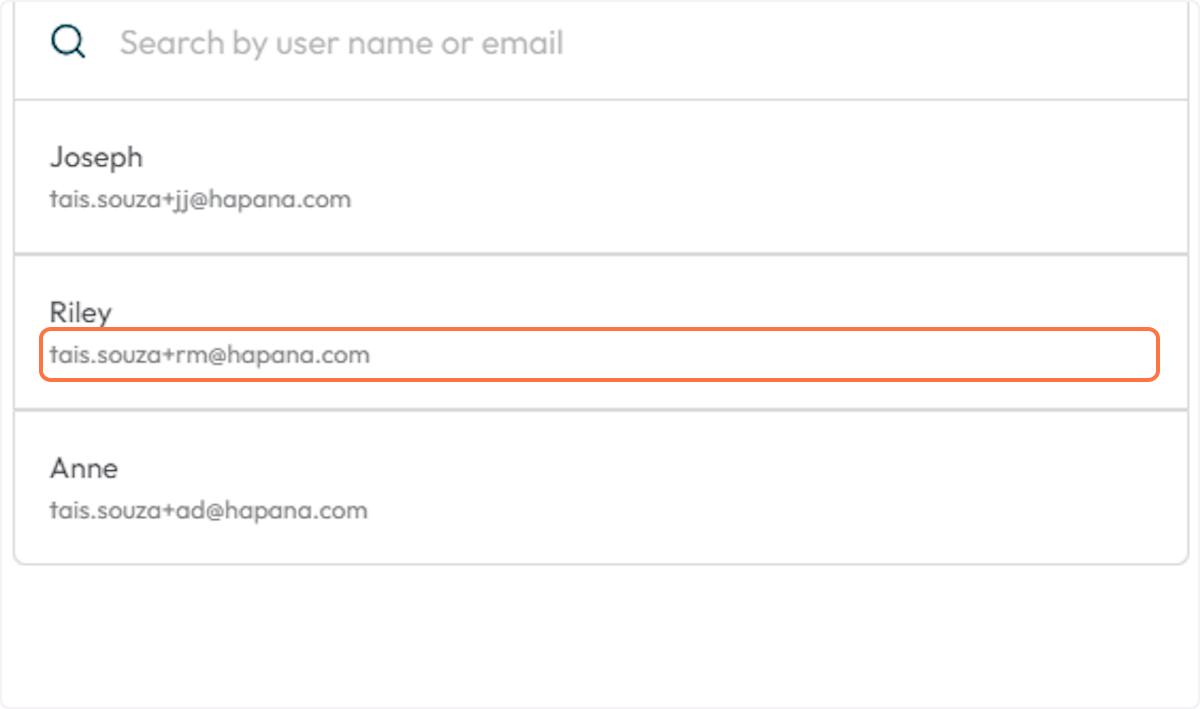
16. Click on the eye icon on the Users column to view the users that have the policy assigned to them.
17. The user will open a sidebar with the list of users with that access policy assigned to them.
18. You can search for a specific poliy by typing the name in to the search bar
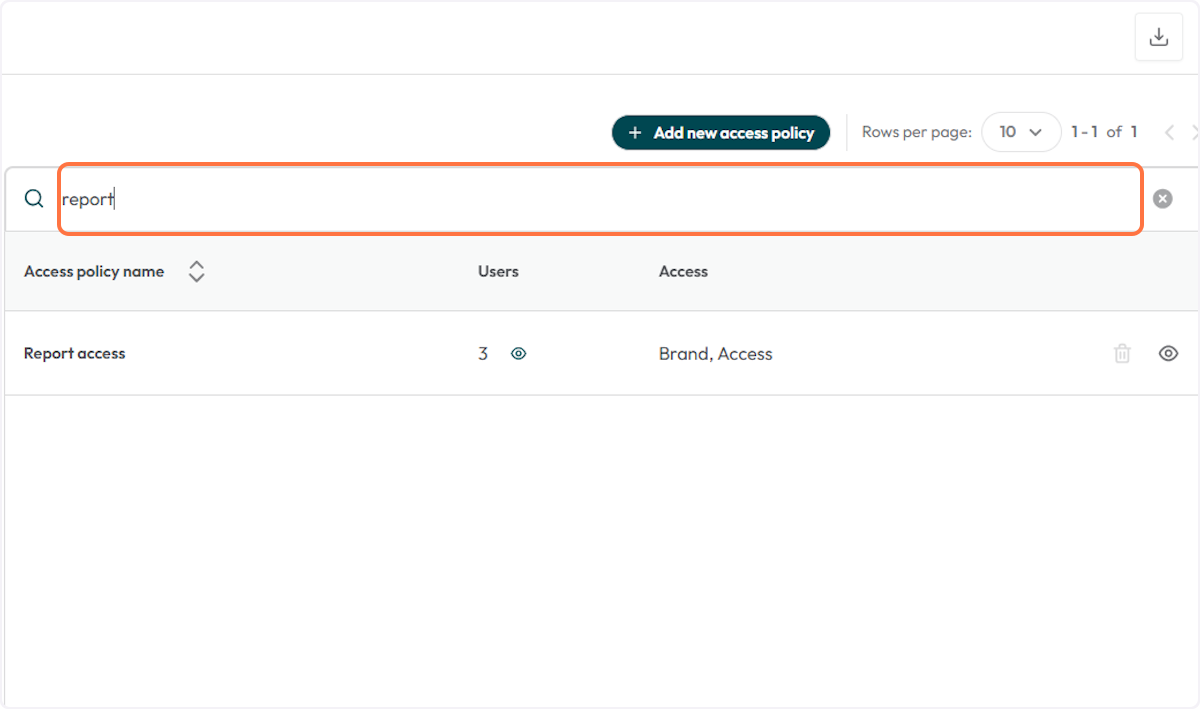
19. To remove the search, just click cancel
